Game Boy Camera calibration
You'll need the following items in order to do this, I've linked them here for your convenience
- Game Boy Camera
- Triwing Screwdriver
- Compatable Battery
- Epilogue GB Operator
- Calibration Save File
- Soldering Iron
- Multimeter
You probably have some of this stuff already. If not, it's all definitely an investment. If you don't know how to solder, learn. That guys videos are really, really good if you're a beginner and will teach you what not to do, while clearly demonstrating proper technique. You can do it, I promise.
Step 1: Replace the battery
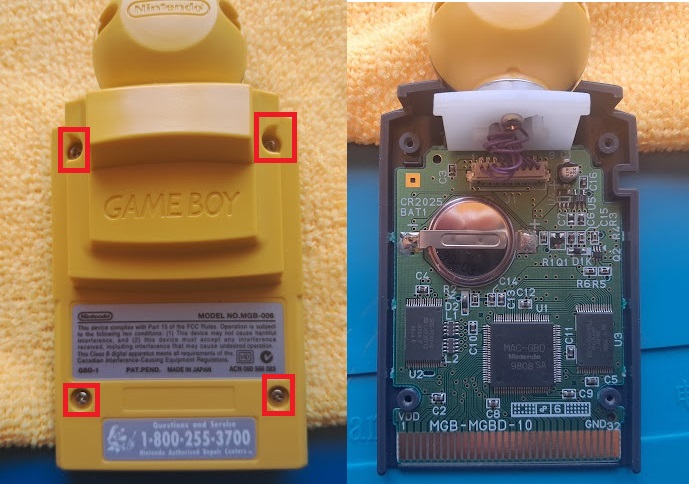
Using a tri-wing screwdriver, unscrew each of the four screws from the back of the Game Boy Camera. You’ll see the battery upon taking off the back cover. We're going to de-solder the old battery and replace it with a new one.
The "lens bulb" itself is a separate part attached to the board with a connector. You don't need to remove it. Use a microfiber cloth to protect the lens while you work. Don't twist or untwist the wiring. Leave anything you're not working on exactly as you found it.
Before you remove the battery, test it with a multimeter. I admit, there's no real reason to do this. It's important to get into the habit of voltage testing if your new to this. Testing the old battery give this reading and confirms that it needs to be replaced.
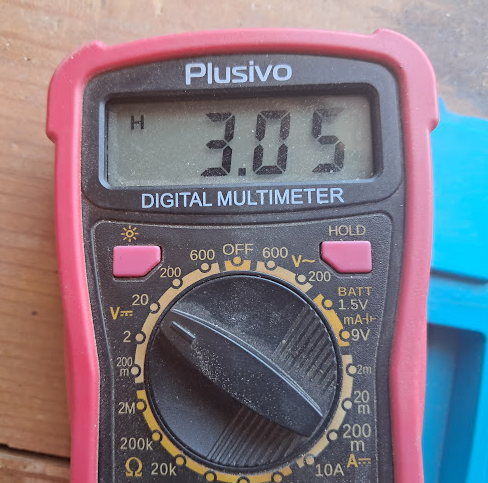
this battery needs to be retired
Test your new battery before you install it. Never assume it's good just because it's new. Don't use cheap garbage batteries off of Amazon or eBay. They don't last as long and can randomly drop current and kill your save data. If you don't recognize the brand, don't install it. console5 sells good quality batteries. Use those.
Make note of the polarity on your new battery. Sometimes, the tabs will be installed upside down relative to the battery you just removed. The board makes it exceedingly clear where each tab should go. Never get complacent and always pay attention to what you're doing.
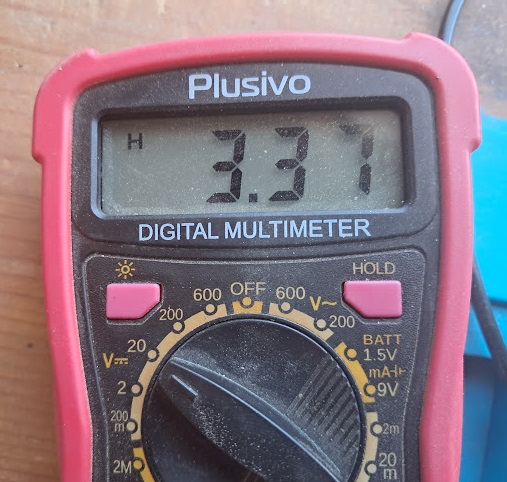
Brand new battery reading
Once you've installed the battery, be sure to check the circuit to ensure it's getting power. If you've done everything correctly, you'll get a reading that is similar to the one your got before the installation. Occasionally, there is a slight drop in voltage. This is normal, and simply indicates that the battery is under load.
Step 2: Use gb operator to install save
Download the save file and get yourself a GB Operator.
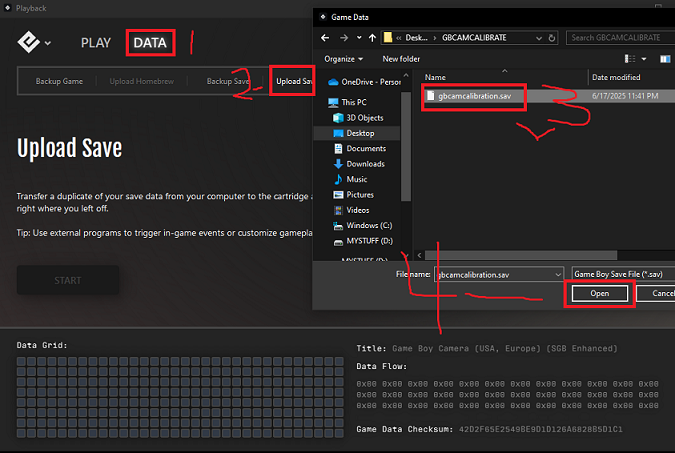
The GB Operator is simple to use. Just install the software and follow the instructions to set it up. With the above linked save file on hand, plug the camera into the GB Operator. Once the software identifies your camera, click “DATA”, then “UPLOAD SAVE”. Once you’ve uploaded the save to your camera, remove the camera from your GB Operator and put it in your Game Boy.
Please DO NOT open this calibration save in a emulator. Emulators don't have camera hardware, so you'll end up with a crash. Not only that, it'll rewrite the save and any camera you upload it to will think it's already calibrated.
Step 3:Calibrating the camera
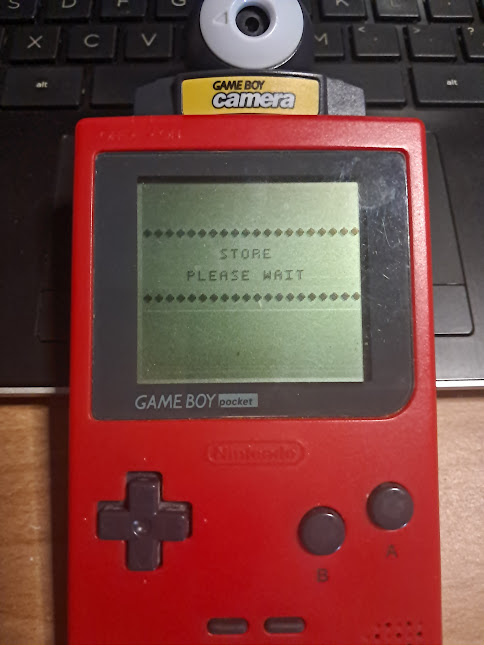
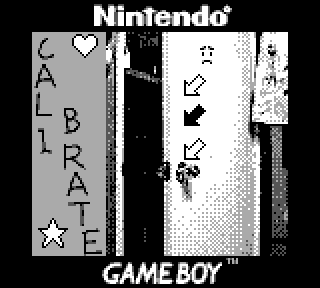
if you can see this screen, you're doing it wrong
Now that you’ve installed the save file, you can calibrate the camera. Calibration requires that no light must be visible to the lens, no matter how faint. Find a pitch black room in your house. Closets, the pantry, your crawl space, It doesn't matter. It just needs to be pitch black. Don't try to use your finger or a blanket to cover the lens. Light will get through these and it'll wreck the calibration.
While in complete darkness, power on the Game Boy Camera. You'll soon hear music. Wait until you hear a fanfare. The fanfare indicates that the calibration process is complete. Leave the dark place and explain to nobody what you’re doing. For extra fun, ruffle your clothing and hair and make it look like you were just on some wild Narnia-esque adventure.
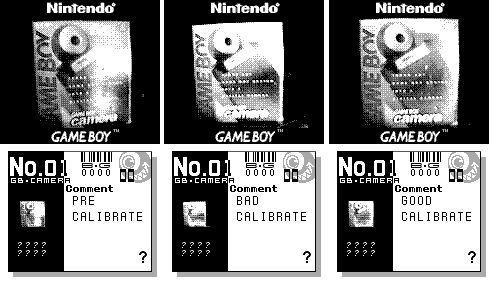
This is a comparison of what the camera will output depending on calibration. All three of these photos were taken within the exact same lighting conditions. On the left is a photo taken with a camera that had it's SRAM wiped. The middle is a calibration using my thumb to cover the lens. The right one was taken using a camera calibrated in pitch darkness.
If your SRAM is ever wiped, you'll need to either recalibrate your camera.